How to setup and configure an EC2 instance
This post show how to configure an Amazon Web Services (AWS) Elastic Compute Cloud (EC2) instance.
Steps to setup and configure an EC2 instance:
- Login to AWS console
- Choose region
- Launch EC2 wizard
- Select AMI
- Select instance type
- Configure network
- Configure storage
- Configure key pairs
- Launch and connect
Following are detailed instructions:
Login to AWS
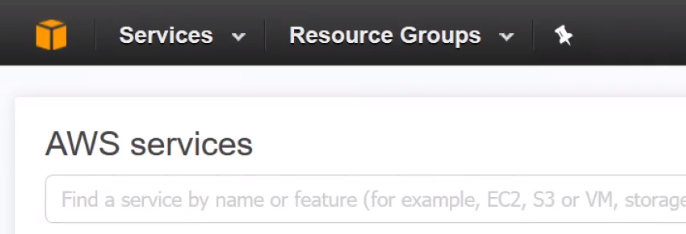
Login into aws console at http://aws.amazon.com. After logging in, you should be on AWS Services page. See figure:
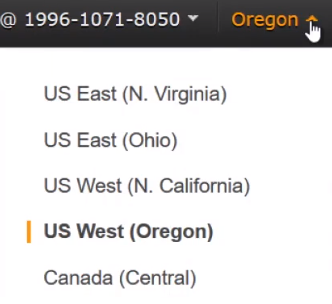
Step 2: Choose the region
You can choose if from the link at the top right. See the figure below:
Launch EC2 wizard
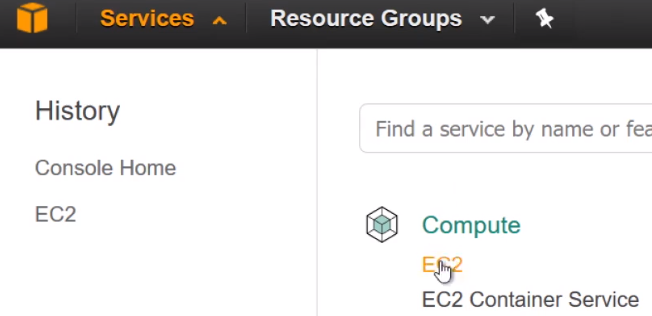
To do so, go to Services and click on EC2 as shown in figure below:
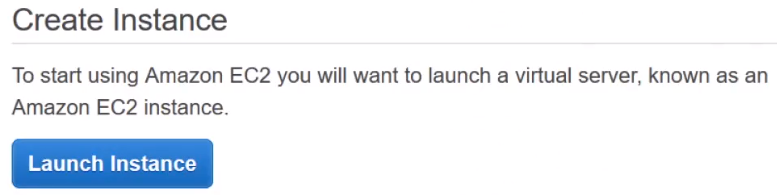
Then click on Launch Instance button:
Choose an AMI
You should see a page like the figure below.
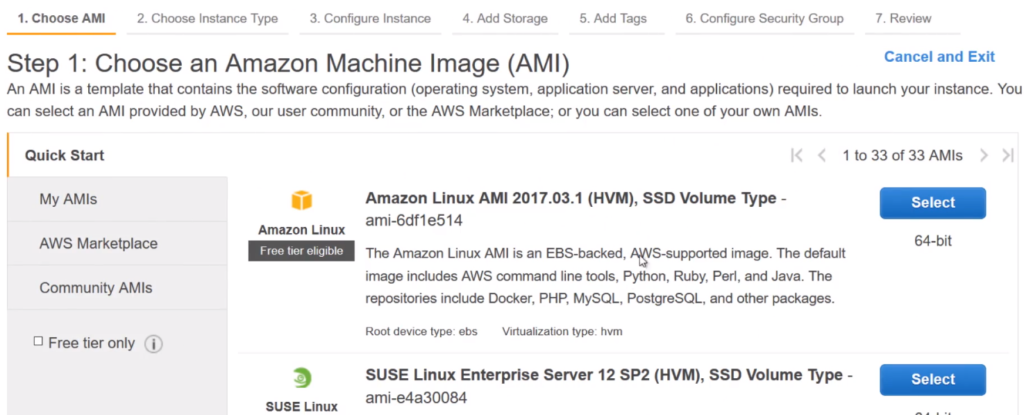
You can simply select an instance by clicking on the Select button next to the AMI. You can can use the My AMIs link to access any AMIs that you have created earlier. AWS Marketplace offers AMIs created by third party vendors. Take you time to choose the right AMI that best suits the intended purpose of the AMI.
Select Instance Type
After selecting an AMI, you should see a page like the following figure:
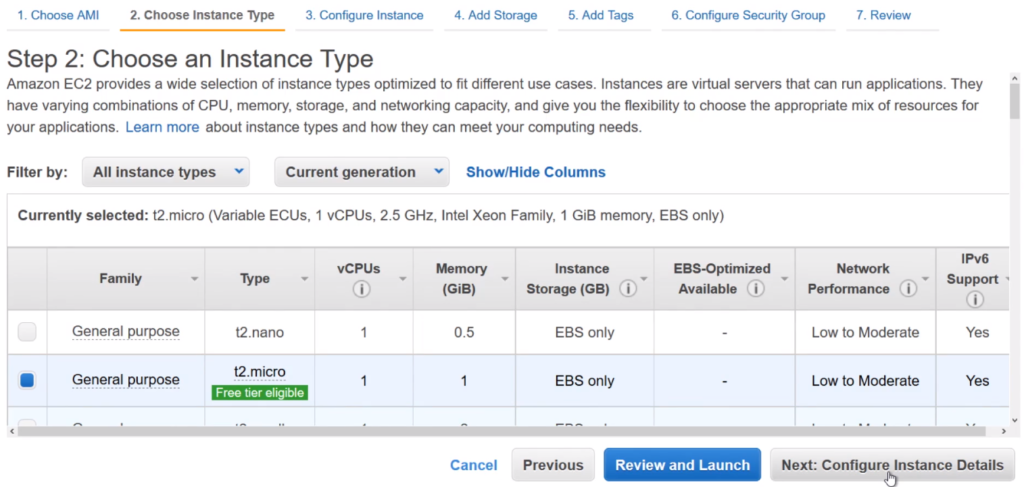
You have to option to select from many instances with different CPU, memory, and storage configurations. Select one and click on Next: Configure Instance Details.
Configure Network
You should see the following page to configure details of the instance you chose.
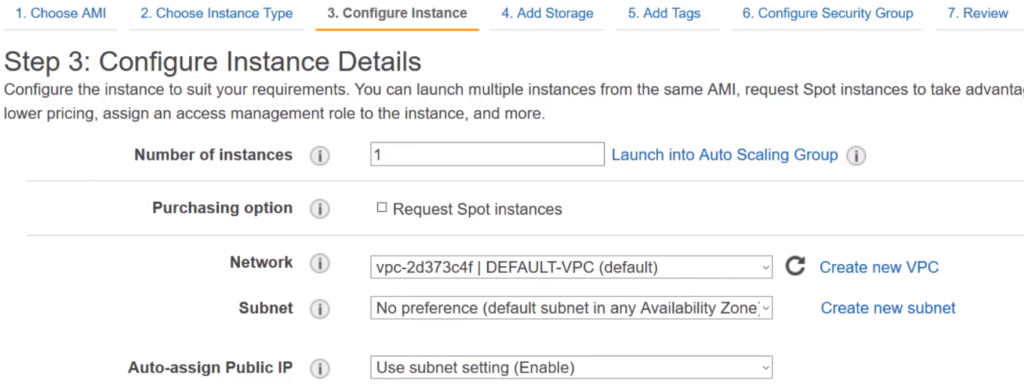
If you are just experimenting, don’t change the default settings. This page is where you configure your networking. Click on Next: Add Storage button.
Configure Storage
This page allows you to configure your storage.
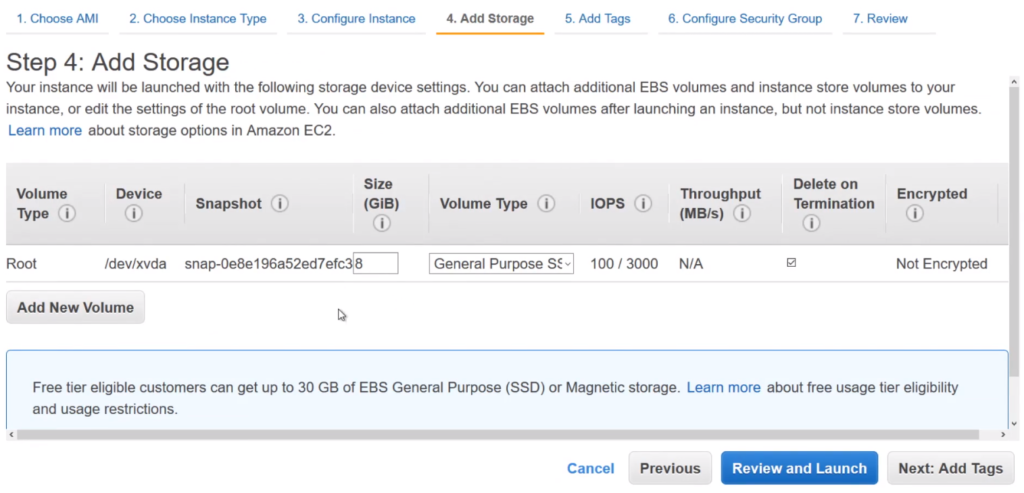
To add a storage, click on Add New Volume button. To delete, check the Delete on Termination checkbox. Then click on Next: Add Tags button.
Add Tags
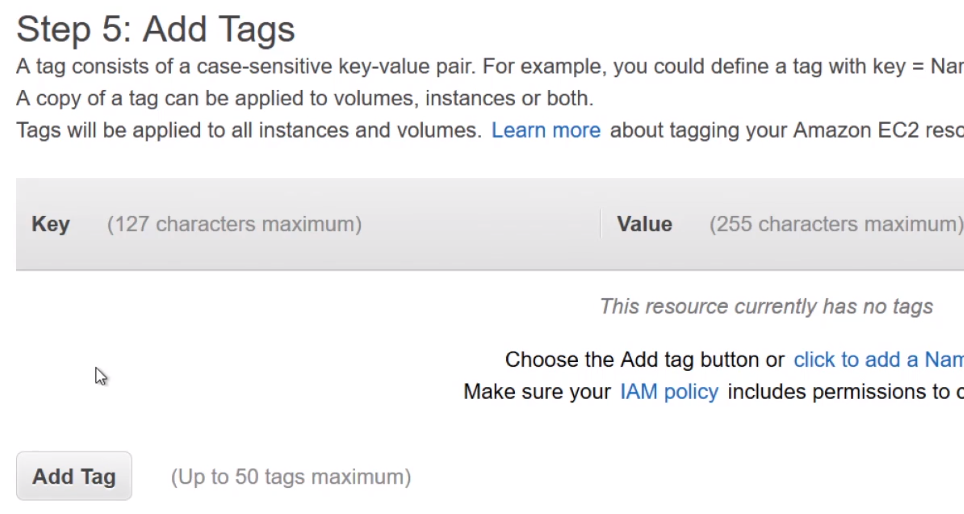
Tags make it easy for you identify you instances. Click on Add Tag button and then fill in value for Key and Value fields. Then click on Next: Configure Security Group.
Configure Security Group
The Configure Security Group allows you to configure firewall rules i.e. who can connect to your instance and how.
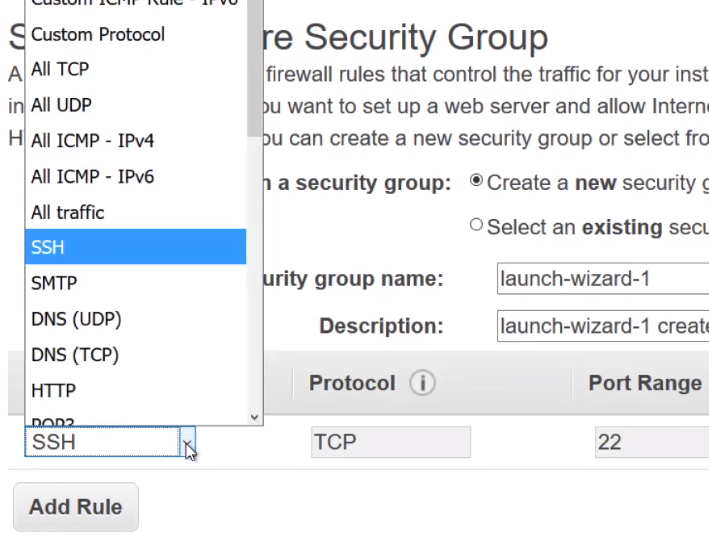
You can configure multiple rules per instance. For example, a rule to connect via SSH another rule to connect via HTTP. To add a rule, simply click on Add Rule button. When you are done configuring, click on Review and Launch button.
Review the instance
The Review Instance page allows you to review your setting one last time before you launch it. To change the configuration, simple click on the numbered linked at the top of the window. To launch, click the Launch button.
Select or Create a key pair
You need to assign a key pair to connect to your instance. You should see the following popup by now:

Create a key pair and then click on Download Key Pair to your computer and keep a mental or written note on where you saved it. You will need the downloaded pem file to connect to your instance using using Putty or another ssh tool. Then click on Launch Instances button.